


Interior and exterior confidence
Create Academy has been such a great resource. I'm in the middle of renovating a bungalow with a very large garden and the courses have offered a wealth of inform...
Harvey
Jun 10, 2026
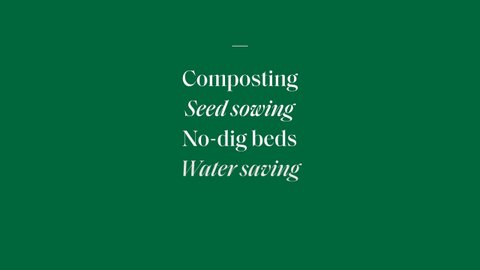
A Seasonal Guide to Wild Gardening
with POPPY OKOTCHA — Ecological food grower and garden writer, passionate about a wilder approach to the way we garden.
Lesson 24 of 30

Subscribe to watch
In this lesson you’ll learn the importance of the no-dig method, and learn how to create a new bed for your growing space.
No-dig doesn't mean never dig, and sometimes you will need to disturb the soil a bit in order to get it ready. So while I wouldn't advise double-digging your space unless it's highly compacted, a little light digging may be necessary.
After you've chosen the spot for your new bed, the first thing you'll need to do is to remove any perennial weeds and roots to ensure they don't spread. The easiest way to do this is to cover the area with a tarpaulin, which will exclude the light and help to kill off any weeds. This will take a few months but will ensure your bed remains weed free.
If you can't wait though, you can do it by hand.
Put simply, the no-dig method requires a lot less labour, yet creates a much better soil life. Digging disturbs the life living in the soil by breaking up the fungal networks that support healthy plants.
While no-dig is harder to achieve on an industrial scale, it's really easy to do in domestic gardens, and if we all started doing it, we'd all draw carbon out of the atmosphere and help lock it in the ground.
We can feed our no-dig beds by chopping plants at the base and leaving the roots in the soil, which will then rot down and turn into organic matter.
Remove any foliage from the area, while leaving the roots in the soil. If you find any invasive plants, like bindweed, soak them in water till they rot, or dry them till they are dead before adding them to your compost heap. Also keep an eye out for cooch grass, brambles and nettles.
If you have any shrubs in the area, clear underneath them and remove any slugs and snails you might find. Remove any dead leaves to make it a less appealing habitat for pests.
At this point, you will need to consider the size of your bed. Depending on your needs, have a think about how wide you need your path to be and how far you are able to stretch across the bed to reach your crops.
Using your arm length as a guide, find out what is comfortable for you.
You don't need to dig over the whole area to remove the roots, just target specific invasive plants and dig them out with a sharp spade or trowel. To ensure you get as much if the root as possible, dig down to a depth of around 10 to 15 cm.
Look out for the following aggressive perennial weeds:
If it's a hot or dry day, water the whole area thoroughly to lock in moisture. Alternatively, after removing the roots, cover the area in tarpaulin (tarp) to kill off any remaining weeds and then remove this on the next rainy day, so that the area can be naturally watered.
Cover the area with overlapping cardboard to exclude the light. This cardboard will rot down into the soil as a natural mulch, so make sure you remove any plastic from it. Make sure every patch of soil is covered.
The cardboard will also keep the soil moist and stop water from evaporating.
Once the cardboard is laid out, water it thoroughly to lock more moisture into your bed.
If you have space, consider making a living path out of twigs and wood chips. These natural materials will slowly break down and will encourage fungal networks and worms, which will provide nutrition for your vegetable bed.
Depending on your needs, you don't need to be too generous with the width of your path, as ultimately, having a thinner path will give you more space for growing.
Cover the area with a layer of compost to a depth of 10 to 15 cm. If you can't access compost, you can plant directly into the cardboard, though obviously this won't be visually appealing.
Once you have covered the area, tramp down the compost with your feet. Check the depth once you have done this to ensure it is of the right depth.
Get the full workbook, video lessons, and more with a Create Academy subscription.
Subscribe to access the full workbookAlready a member? Sign in to watch
479 reviews
Read moreCreate Academy has been such a great resource. I'm in the middle of renovating a bungalow with a very large garden and the courses have offered a wealth of inform...
Harvey
Jun 10, 2026
Absolutely love Create Academy! The instructors are extremely informative, and it is beautifully filmed. Create Academy is great value for money and plan on renew...
SG
May 31, 2026
Butter's creativity is stunning! Her ability to incorporate brilliance in small gardens is magical!
Carla
May 30, 2026
The best adventure. I like all the courses, but my favorite are both Rita Konig interior design courses and Anna Jones. Excellent!
Karolina Kluczewska
May 20, 2026
Create Academy has been such a great resource. I'm in the middle of renovating a bungalow with a very large garden and the courses have offered a wealth of information to dive into and explore new ideas. I'm...
Harvey
Jun 10, 2026
Absolutely love Create Academy! The instructors are extremely informative, and it is beautifully filmed. Create Academy is great value for money and plan on renewing my subscription yearly because there are ...
SG
May 31, 2026
Butter's creativity is stunning! Her ability to incorporate brilliance in small gardens is magical!
Carla
May 30, 2026
Your Instructor
Ecological food grower and garden writer, passionate about a wilder approach to the way we garden.
Poppy Okotcha is a trained horticulturist and ecological gardener, on a mission to inspire people to engage with the natural world. Whilst now focused on her own budding garden in Devon, Poppy began her formal horticulture studies with the Royal Horticultural Society. After honing her understanding of regenerative growing techniques she went on to learn forest gardening from Martin Crawford in one of the oldest ‘food forests’ in England, and qualified as a Permaculture Designer. An ambassador for WWF and Nature is a Human Right, Poppy has been featured on Gardeners’ World (BBC2); has presented Series 1 of The Great Garden Revolution (Channel 4); is a podcast guest; and writes for publications including LivingEtc and Wicked Leeks.

Access to all courses


